Start with the product, not the machine
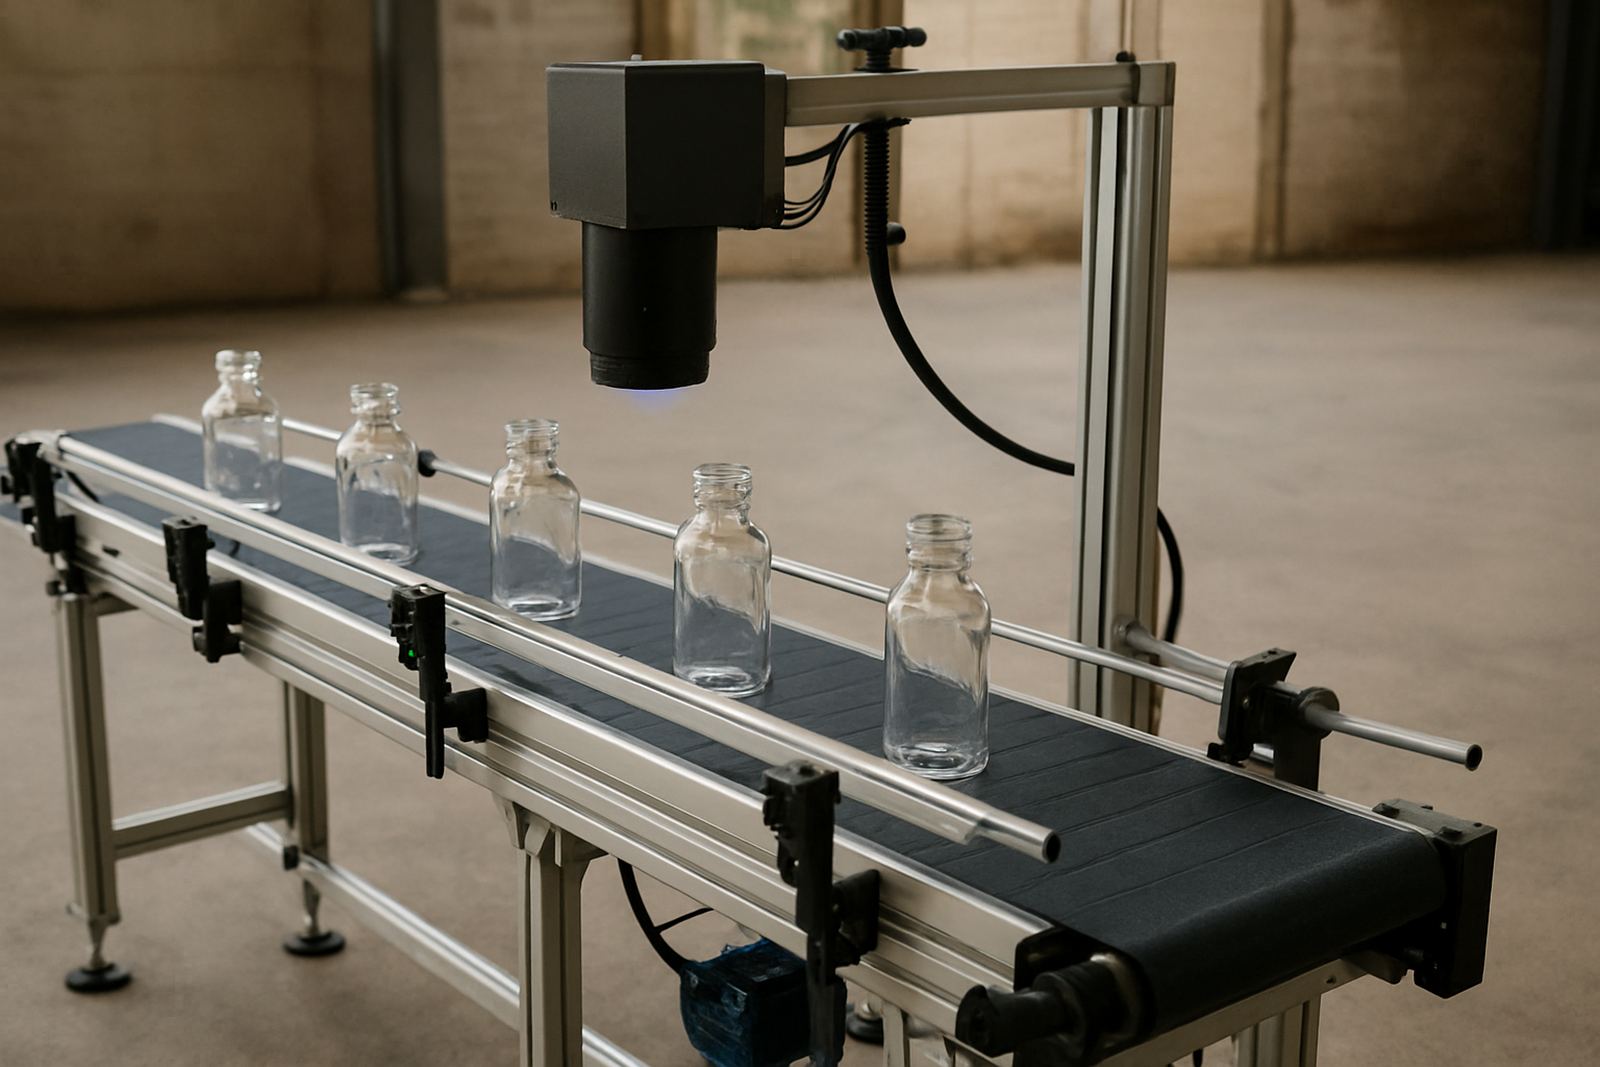
Before anyone drills a base plate or runs a cable tray, look at the product itself. Glass and plastic behave differently on a conveyor, and so do round bottles, flat trays, caps, medical parts and clear film packs. The marking head can only do its job if the product arrives in a repeatable position, with enough dwell time and without wobble.
On a busy line in Jet Park, for example, a slight product twist can shift a logo or code enough to make it unreadable at packout. That is why the first check is simple: what is moving, how fast is it moving, and how consistently does it pass the marking point. If the answer changes from shift to shift, the integration needs fixing before the laser goes in.
- Confirm product size range, wall thickness and surface finish.
- Check whether the item runs upright, sideways or on a carrier.
- Measure the actual line speed at normal production, not the rated speed.
- Note any product sway, vibration or lane transfer issues.
Check spacing, dwell time and trigger accuracy
UV laser marking on a conveyor depends on timing. If products are too close together the sensor may trigger early, late or on the wrong item. If spacing changes, the software has to keep up. That is why a proper site check includes the gap between products, the stability of the conveyor motor and the trigger method used to tell the marker when to fire.
In practice, a good integration test should show that the marker can follow the line without chasing errors. A stable trigger is more important than a faster one. If the product pauses under a stop gate, the mark can be made with less risk. If the line runs continuously, then encoder feedback and proper signal timing become part of the job.
- Measure the gap between products at full production speed.
- Test the sensor position against reflective or clear surfaces.
- Confirm whether the line uses a stop-start cycle or continuous flow.
- Check that the trigger point stays steady after changeovers and cleaning.
Make sure the conveyor and marking zone fit together
The marking head needs the right amount of physical space, and so does the operator who has to clean, inspect and service it. The beam path must stay clear, the mount must not shake and the conveyor should allow easy access to the mark point without forcing staff to reach over moving parts. This is where many installations go wrong: the machine is sound, but the frame, guards or product guides are not suited to marking.
For glass and clear plastics, reflectivity and surface movement can also affect mark quality. On some lines the product rides too high or too low, so the focus distance changes from one item to the next. If the line is in a humid coastal area, dust and moisture can build up around guides and sensors faster than expected, so the mounting arrangement needs to make cleaning quick and practical.
- Check the available mounting height and beam clearance.
- Confirm that guards, access doors and emergency stops remain usable.
- Allow space for cleaning cloths, inspection and routine adjustments.
- Keep the marking zone away from splashes, rinse-down areas and loose packaging debris.
Plan for controls, power and line communication
A conveyor integration is only as good as the signals behind it. The marker may be mechanically in place, but if the controls cabinet, interlocks and PLC signals are not set properly the line will stop while the team troubleshoots what should have been sorted during setup. Good integration work includes the input and output signals, fault handling and how the marker talks to the conveyor system.
In South African plants, load-shedding is another practical issue. If the line drops out and restarts, the marker must return to its correct state without leaving half-finished codes or repeated marks on the next product. A proper setup should include a safe restart sequence, clean software settings and enough protection for power fluctuations. It is a small detail that saves a lot of wasted stock.
Before sign-off, ask whether the line can recover after a stop, a jam or a power interruption without losing product traceability.
Build the fixture around the process, not the other way round
Fixture design is often what makes the difference between a neat marking line and one that gives trouble every week. A bottle neck, a flat pack or a moulded plastic component may need a simple carrier, a locater or a guide that holds it steady at the exact point of mark. If the fixture is too loose, the mark drifts. If it is too tight, changeovers become slow and operators start bypassing it.
For a Boksburg manufacturer running mixed plastic parts, a well-made fixture can cut setup time and help operators keep the mark in the same place after cleaning or changeover. It also makes training easier because the team can see where the product must sit. The aim is not to complicate the line, but to make the repeat process easier to follow. Practical fixture work should also take future maintenance into account, so parts can be removed and replaced without stripping half the line.
- Use guides that suit the product shape and its normal movement.
- Keep changeover parts simple and labelled clearly.
- Allow enough adjustment for wear and minor line variation.
- Make sure the fixture does not trap dirt or moisture.
Test, train and maintain before full production
A conveyor line should never go live on a guess. Sample testing must show that the mark stays readable at the actual speed, with the actual product and the actual operator team. Once that is confirmed, the installation should include hands-on training, so staff know how to load the line, check the mark, clean the work area and spot early warning signs before a fault turns into downtime.
For a plant in Germiston or Kempton Park, the best results usually come from a short start-up period where the line is watched closely and minor settings are adjusted while the product is still in small batches. After that, preventive maintenance keeps the system steady: lens checks, sensor checks, software backup and a look at mounts, cables and safety devices. That sort of routine keeps breakdowns lower and gives the production team confidence on every shift.
When conveyor integration is done properly, the laser becomes part of the line flow rather than an extra problem to manage.